How to Turn Lecture Slides or Notes Into Flashcards Fast
The fastest way to turn notes into flashcards is to skip the card-by-card typing: read each slide once, write one question and answer per idea as a plain line of text, then paste the whole list into a flashcard maker in one go. A 40-slide lecture usually gives you 25 to 50 good cards, and with this method that takes about as long as one careful read-through of the slides.
You can do the pasting part in the free flashcard maker, with no account and nothing to install. This guide shows you how to decide what deserves a card, how to word cards so they take seconds to write, a full worked example from a real lecture topic, and a weekly routine so card-making never eats more time than studying.
🃏 Quiz yourself: 12 cards from this page
Read the front, say your answer, then tap the card to check.
Make, study & print this deck → Opens the free flashcard maker with all 12 cards ready to edit or print.▶ Open this deck in the flashcard maker
Why Making Cards Takes Longer Than Studying Them
If you've ever spent two hours making cards and twenty minutes reviewing them, you're not doing it wrong on purpose. The process is just set up badly by default. Here's where the time actually goes.
You copy instead of choose. The slide says it, so it goes on a card. That turns every bullet point into a card, and lecture slides have a lot of bullet points. Most of them are context, not things you'll be asked to recall.
You format as you go. Click a box, type the front, click another box, type the back, click "add," repeat. Each card carries a few seconds of clicking. Multiply that by 60 cards and you've lost a real chunk of your evening to mouse work.
You rewrite the slide in full sentences. A back that reads like a paragraph takes a long time to type and an even longer time to review. Worse, you can't really tell whether you knew it, because a paragraph is never fully right or fully wrong.
You go back and forth between windows. Slides in one tab, card tool in another, notes in a third. Every switch costs a little attention, and you lose your place.
You make cards for things you already know. The opening slides of a lecture often review last week. If you already know them cold, those cards just pad the deck.
The fix for all five is the same: separate deciding from typing, and separate typing from formatting. You decide what matters while you read. You type plain lines in one place. Then the tool does the formatting for every card at once.
The Three-Pass Method at a Glance
Here's the whole method on one table. Each pass has one job, so you're never doing two kinds of thinking at the same time.
| Pass | What you do | Time for a 40-slide lecture | Output |
|---|---|---|---|
| 1. Skim and mark | Flip through every slide and mark the ones with testable ideas | 5–8 minutes | A short list of slide numbers |
| 2. Write lines | For each marked slide, type one front : back line per idea |
20–35 minutes | 25–50 plain text lines |
| 3. Paste and check | Paste the list, fix anything that split badly, add pictures if needed | 5–10 minutes | A finished deck ready to study or print |
That's roughly 30 to 50 minutes for a full lecture. Compare that with clicking through a card form one card at a time, and with rewriting slides by hand, and you'll often save half your card-making time or more.
Notice there's no "make it pretty" pass. Pretty doesn't help you remember. Short, clear, one-idea cards do.
Pass 1: Skim the Slides and Mark What Matters
Open the slides and go through them quickly. Don't write cards yet. You're only answering one question per slide: "Could someone ask me about this on a quiz?"
Mark a slide if it has any of these:
- A new term with a definition. "Osmosis is the movement of water across a semipermeable membrane." That's a card.
- A number, date, or formula you need to recall. Rates, dates, equations, ranges, thresholds.
- A list the professor said to know. Steps of a process, stages of a cycle, causes of an event.
- A comparison. Two things side by side on one slide almost always become a "what's the difference" question.
- A diagram with labels. These turn into picture cards later.
- Anything the instructor repeated, emphasized, or said "this will be on the exam" about. Your notes from class matter more than the slide text here.
Skip a slide if it's:
- A title or agenda slide.
- A review of material you already have cards for.
- A story, example, or photo meant to make the lecture interesting, unless the example itself is something you'll be tested on.
- A "questions?" or summary slide that repeats earlier slides.
A practical way to mark: just jot the slide numbers in a note, like "4, 6, 7, 11, 12, 15–18, 22." If your slides are a PDF, you can also use the highlight tool, but a list of numbers is faster and keeps you moving.
How many slides should you mark? In a typical lecture, maybe half to two-thirds of the slides carry something card-worthy. If you've marked every single slide, you're copying, not choosing. Go back and drop the ones that are context.
If you're working from handwritten or typed notes instead
The same pass works on notes. Read through once and put a small mark in the margin next to anything that's a definition, a number, a list, or a comparison. If you take notes in the Cornell format, your cue column is already doing this job for you. The questions you wrote in the left column are close to ready-made card fronts. Our page on the Cornell note-taking method shows how that layout works if you'd like to set up future notes so they convert even faster.
Pass 2: Write Every Card as One Line of Text
This is where most of the time savings come from. Open a plain text place to type: a notes app, a blank document, or even a text file. Then, for each marked slide, write one line per idea in this format:
front : back
That's the format the maker's Paste a list box reads: one card per line, front and back separated by a colon with a space on each side. You never click a single box while you're writing.
Here's what that looks like for three slides from an intro biology lecture on cells:
Function of the cell membrane : Controls what enters and leaves the cell
Organelle that makes most of the cell's ATP : Mitochondrion
Function of ribosomes : Build proteins
Three slides, three lines, maybe 45 seconds of typing.
The four card shapes that cover almost every slide
You don't have to invent a new card style for each slide. Nearly every lecture idea fits one of four shapes. Once these are habits, you'll write lines almost as fast as you can read.
| Shape | Use it when the slide has... | Front pattern | Back pattern |
|---|---|---|---|
| Term | A word and its meaning | The term | A short definition in your words |
| Question | A fact, number, or cause | A direct question | The shortest correct answer |
| Fill-in | A key sentence or formula | The sentence with one word replaced by a blank | The missing word |
| Compare | Two similar things | "X vs. Y" | The single main difference |
Some quick examples of each shape from different subjects:
Mitosis : Cell division that makes two identical cells
What year did the Berlin Wall fall? : 1989
Newton's second law: F = ___ : m × a (mass times acceleration)
Mitosis vs. meiosis : Mitosis makes 2 identical cells; meiosis makes 4 genetically different cells
Look at the third line. It has a colon inside the front ("law: F"). That can confuse a list that's split on colons. The simple habit is to keep extra colons out of your cards. Write "Newton's second law, F = ___" instead. It reads the same and pastes cleanly.
Write the question you'd actually be asked
A slide titled "Causes of World War I" tempts you to write a card like "Causes of World War I : Militarism, alliances, imperialism, nationalism, and the assassination of Archduke Franz Ferdinand." That's a list card, and list cards are hard to grade yourself on. Did you get it if you remembered four out of five?
Break it up instead:
What does the M in MAIN stand for (causes of WWI)? : Militarism
What does the A in MAIN stand for (causes of WWI)? : Alliances
What does the I in MAIN stand for (causes of WWI)? : Imperialism
What does the N in MAIN stand for (causes of WWI)? : Nationalism
Event that triggered the outbreak of WWI in 1914 : The assassination of Archduke Franz Ferdinand
Five quick lines that each have one clear right answer. You'll review them in less time than the one long card, and you'll know exactly which piece you keep forgetting. This idea has a name, the minimum information principle, and our short explainer on the minimum information principle covers why small cards beat big ones.
Speed rules for Pass 2
- Use your words, not the slide's. Rephrasing forces you to understand the idea, and your own phrasing is usually shorter.
- Answers should be short. Aim for a word, a number, or one short line. If the back runs past about 20 words, split the card.
- Don't fix typos yet. Keep moving. You'll catch them in Pass 3 or the first time you study.
- Write fronts as questions when you can. "Where does glycolysis happen?" is easier to answer honestly than "Glycolysis location."
- Mark diagram cards with a tag. If a card needs a picture, add "(pic)" at the end of the front so you remember in Pass 3.
- Set a soft limit. For one lecture, 25 to 50 cards is plenty. If you're past 60, you're probably carding context again.
A Worked Example: One Lecture, Start to Finish
Let's walk through an actual lecture so you can see the method on real content. Picture a 35-slide intro biology lecture on cellular respiration. In Pass 1 you skim and mark 20 slides: the overview, glycolysis, the link reaction, the Krebs cycle, the electron transport chain, ATP totals, and fermentation. The opening review slides and a slide of photos of runners get skipped.
In Pass 2 you write these lines. They're ready to paste once you put " : " between each front and back:
| Front | Back |
|---|---|
| Overall equation of cellular respiration | Glucose + 6 O2 → 6 CO2 + 6 H2O + energy (ATP) |
| Main purpose of cellular respiration | To release energy from food and store it as ATP |
| Three main stages of aerobic respiration | Glycolysis, the Krebs cycle, the electron transport chain |
| Where does glycolysis happen? | In the cytoplasm |
| Does glycolysis need oxygen? | No |
| What does glycolysis turn one glucose into? | Two pyruvate molecules |
| Net ATP from glycolysis per glucose | 2 ATP |
| Electron carrier made in glycolysis | NADH |
| Where is pyruvate converted to acetyl-CoA? | In the mitochondrial matrix |
| Gas released when pyruvate becomes acetyl-CoA | Carbon dioxide |
| Other name for the Krebs cycle | The citric acid cycle |
| Where does the Krebs cycle happen? | In the mitochondrial matrix |
| Molecule that enters the Krebs cycle | Acetyl-CoA |
| Electron carriers made in the Krebs cycle | NADH and FADH2 |
| Waste gas released by the Krebs cycle | Carbon dioxide |
| How many turns of the Krebs cycle per glucose? | Two (one for each pyruvate) |
| Where is the electron transport chain? | The inner mitochondrial membrane |
| Final electron acceptor in the electron transport chain | Oxygen |
| What does oxygen form at the end of the chain? | Water |
| What does the electron transport chain pump across the membrane? | Hydrogen ions (protons) |
| Enzyme that makes most of the cell's ATP | ATP synthase |
| What powers ATP synthase? | Hydrogen ions flowing back through it |
| Name for making ATP using the proton gradient | Oxidative phosphorylation (chemiosmosis) |
| Stage that makes the most ATP | The electron transport chain |
| Approximate total ATP per glucose (aerobic) | About 30–32 ATP (older texts often say 36–38) |
| What happens to the chain without oxygen? | It stops, because nothing accepts the electrons |
| Main job of fermentation | Regenerate NAD+ so glycolysis can continue |
| Product of lactic acid fermentation | Lactate (lactic acid) |
| Where does lactic acid fermentation happen in humans? | In muscle cells during hard exercise |
| Products of alcoholic fermentation | Ethanol and carbon dioxide |
| Organism known for alcoholic fermentation | Yeast |
| ATP per glucose from fermentation | 2 ATP (from glycolysis only) |
| Aerobic vs. anaerobic | Aerobic uses oxygen; anaerobic does not |
That's 33 cards from one lecture. Notice a few things about them.
Every back is short. You can answer most of these in two or three seconds once you know them.
The ATP total card is honest about the textbook difference. Different books give different totals, so the card says so. When your own course gives a number, use your instructor's number on the card and drop the rest.
Some ideas appear twice from different angles. "Where does the Krebs cycle happen?" and "Where is pyruvate converted to acetyl-CoA?" have the same answer. That's fine. The exam might ask either way.
There's no card for the runner photos. They made the lecture interesting, but there's nothing to recall.
In your text file, the first three rows look like this:
Overall equation of cellular respiration : Glucose + 6 O2 → 6 CO2 + 6 H2O + energy (ATP)
Main purpose of cellular respiration : To release energy from food and store it as ATP
Three main stages of aerobic respiration : Glycolysis, the Krebs cycle, the electron transport chain
And so on down the list. If you'd like to try this exact deck, copy the rows from the table, put a " : " between each front and back, and paste.
How to Build This Deck in the Flashcard Maker
This is Pass 3. Your lines are written; now they become cards. Here are the exact steps in the flashcard maker on our homepage.
- Name the deck. Type a deck title that includes the course and lecture, like "BIO 101, Lecture 7, Cellular Respiration." When you have a stack of decks later, you'll be glad you did.
- Open Paste a list. Paste all your lines into the box. Each line becomes one card, with the text before the colon on the front and the text after it on the back.
- Choose Add to deck or Replace deck. If the deck is empty, either works. If you're adding Lecture 8 to an existing deck, choose Add to deck so you keep what's already there. Replace deck swaps out the current cards for your new list.
- Scan the cards. Look for any card that split in the wrong place, usually because of an extra colon. Fix it right on the card. This takes a minute or two.
- Add pictures where you tagged "(pic)." Use the option to add a picture to a card for diagram slides. A labeled mitochondrion, a map, a graph shape, or a structure diagram can go on the front with a question like "Name the labeled part." Use images you made yourself or ones you're allowed to use, such as a screenshot of your own course slide for personal study. Delete the "(pic)" tag once it's done.
- Add any stragglers with + Add card. If you remember one more idea from class, add it by hand. No need to repaste.
- Study it once right away. Switch to Study mode, hit Shuffle, and go through the deck with Flip and Next. Use Read aloud if you'd like to hear the cards, which helps for terms you're not sure how to pronounce.
- Save a copy. Click Download .csv to keep a file of the deck on your computer. You can bring it back later with Import a file, which is handy if you clear your browser or switch computers.
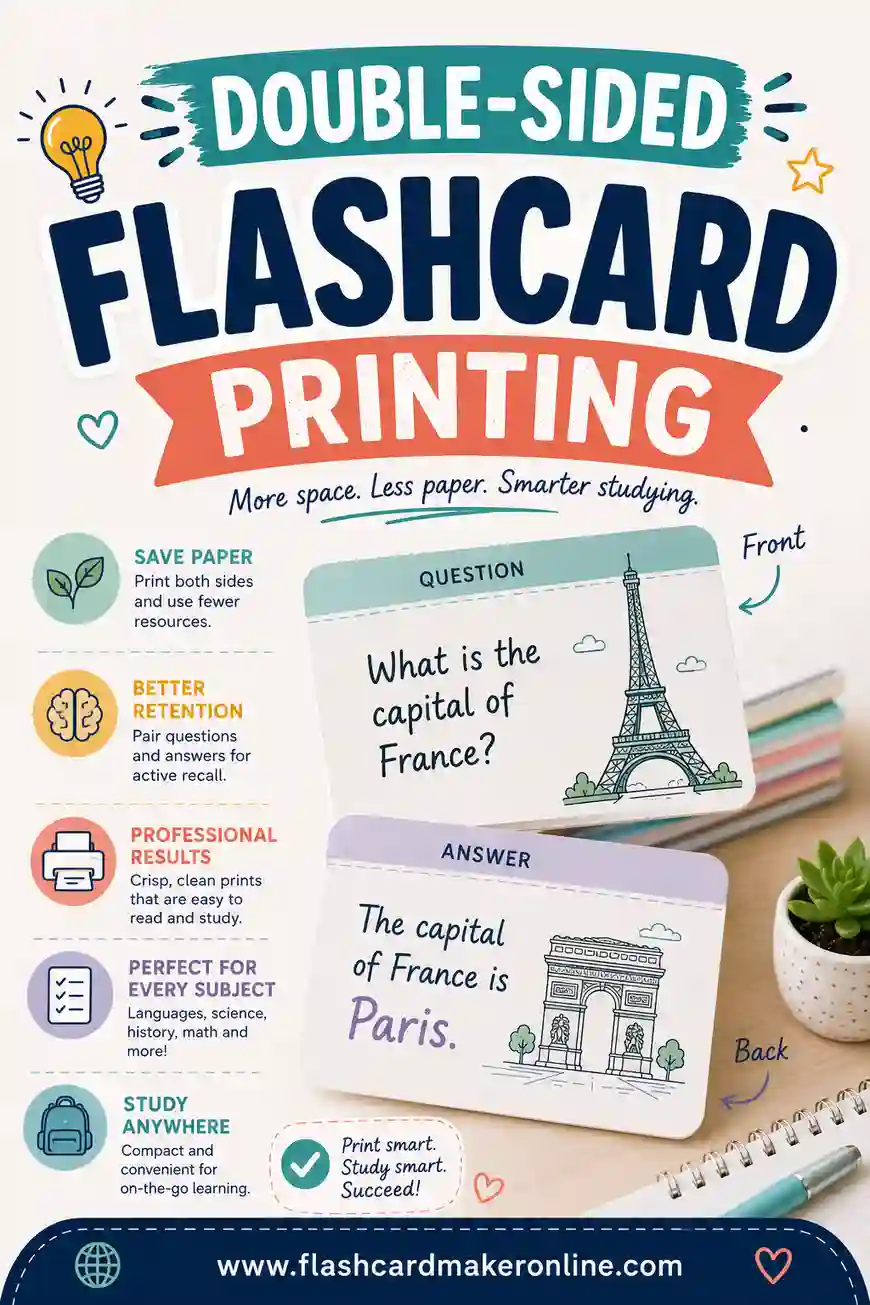
- Print if you like paper. In Print, choose Double-sided so the backs line up behind the fronts, or Fronts only if you'll write answers on the back by hand. For a lecture deck, the Standard size or the 3×5 index card size works well. Use Print a test page first to check that your printer lines the two sides up, then print or save as PDF.
If you study with classmates, Get share link gives you a link that hands anyone who opens it their own copy of the deck. Split a lecture between three people, each person writes a third of the lines, one person pastes them all in, and everyone gets the full set from the link.
What if my slides are a PDF or PowerPoint file?
You don't need to convert anything. Keep the slides open in one window and your plain text file in the other, side by side. Read a slide, type its lines, move on. Copying text straight from a slide is fine for long terms you don't want to misspell, but resist pasting whole bullet points. The few seconds you spend rewording are where the learning starts.
If your instructor posts slides with speaker notes, read those too. They often hold the real explanation, and the slide is just the headline.
How different subjects change the cards
The three passes stay the same in every class. What changes is which card shape you lean on. Here's a quick guide.
| Subject type | Most useful card shapes | Example line |
|---|---|---|
| Sciences (biology, chemistry) | Question, compare, picture | Ionic vs. covalent bond : Ionic transfers electrons; covalent shares them |
| Math and physics | Fill-in for formulas, question for "when to use" | Area of a circle = ___ : πr² |
| History and government | Question for dates, causes, and people | Year the US Constitution was signed : 1787 |
| Languages | Term both ways (word to meaning and meaning to word) | el libro : the book |
| Psychology and social sciences | Term plus an example card | Example of negative reinforcement : Taking an aspirin removes a headache, so you take it again next time |
| Nursing and health | Question, compare, normal ranges from your course | Normal adult resting heart rate : 60–100 beats per minute |
| Business and economics | Term plus a "what happens if" card | If demand rises and supply stays the same, price... : Tends to rise |
| Literature | Question for characters, themes, and quotes you must identify | Who narrates The Great Gatsby? : Nick Carraway |
Math and physics need a second kind of card. Knowing the formula is half the job. Add a card that asks when you'd use it, like "You know mass and acceleration and need force. Which formula?" Then do practice problems, because flashcards don't replace working problems.
Languages go both ways. Make the card in one direction from your slides, then paste the same list again with the sides swapped so you also practice producing the word, not just recognizing it.
History loves a "why" card. Dates are easy cards, but exams often ask why something happened. Add one cause or effect card for each major event.
A Weekly Routine So Card-Making Never Piles Up
The real time sink isn't one lecture. It's the backlog. Five lectures behind means five decks to make the night before an exam, and that's when card-making really does take longer than studying. The fix is to make cards the same day, in a short window, every time.
Here's a sample week for a class that meets Monday, Wednesday, and Friday.
| Day | Card-making | Review |
|---|---|---|
| Monday | Lecture 1: three passes, about 35 minutes | Study the new deck once in Study mode |
| Tuesday | None | Review Monday's cards, about 10 minutes |
| Wednesday | Lecture 2: three passes, about 35 minutes | Monday's cards plus the new deck |
| Thursday | None | Review all cards you missed this week |
| Friday | Lecture 3: three passes, about 35 minutes | New deck once, then a quick shuffle of the week |
| Saturday | None | Full weekly deck, shuffled, out loud |
| Sunday | Fix or split any cards that kept tripping you up | Light review or a rest day |
A few notes on making this stick:
- Make cards within 24 hours of the lecture. The material is fresh, your class notes still make sense, and you remember which parts the instructor stressed.
- Keep review short and daily. Ten to fifteen minutes a day beats an hour once a week. If you're not sure how big your daily review should be, our guide on how many flashcards to study per day gives practical numbers.
- Combine lecture decks at the end of each unit. Before a unit test, use Add to deck to bring the unit's lectures into one deck, then shuffle. Mixed review is closer to how the test will feel.
- Retire easy cards. Once a card has been right every time for a couple of weeks, move it to a "done" pile or a separate unit deck for final-exam review only.
Common Mistakes and Quick Fixes
| Mistake | What it costs you | Quick fix |
|---|---|---|
| Carding every bullet point | A bloated deck that takes forever to make and review | Mark slides first, then card only testable ideas |
| Paragraph-length backs | Slow review and no clear right or wrong | Split into one-fact cards |
| Copying slide text word for word | Cards you can "recognize" but can't explain | Rewrite each idea in your own words |
| Cards with no context | "What is the main function?" of what? | Put the topic in the front: "Main function of ribosomes" |
| Extra colons in the text | Cards split in the wrong place when pasted | Use a comma or dash instead of a colon inside a card |
| Making cards the week before the exam | Card-making takes over study time | Card each lecture within 24 hours |
| Only one direction for terms | You recognize words but can't produce them | Paste the list a second time with sides swapped |
| Skipping pictures for diagram-heavy topics | Labeled-diagram questions feel brand new on the test | Add a picture card for every key diagram |
| Never testing yourself, just flipping | It feels like studying, but recall doesn't improve | Say the answer out loud before you flip |
The last one matters most. Making cards is the setup; the actual learning happens when you try to recall the answer before you see it. If you're wondering whether a deck is worth the effort compared with rereading your notes, our comparison of flashcards vs. notes lays out what each one is good for.
When you're really short on time
Sometimes there's no time for the full method. The quiz is tomorrow, and there are three lectures you haven't touched. Here's a stripped-down version.
- Only card what the instructor flagged. Check your class notes and any study guide for terms or topics the instructor emphasized. Card those first.
- One card per slide, max. Pick the single most testable idea on each marked slide.
- Use term cards almost everywhere. They're the fastest shape to write. Term on the front, a few words on the back.
- Paste, Shuffle, go. Skip pictures and printing. Go straight to Study mode and run the deck two or three times, then once more right before the quiz.
It won't be as strong as a deck built over a week. It'll still beat rereading slides, because you're practicing recall instead of just looking.
Make Your First Lecture Deck Today
Pick your most recent lecture. Skim and mark the slides, write your lines in front : back form, and paste them into the free flashcard maker. In about half an hour you'll have a deck you can study on screen, share with a classmate, or print as double-sided cards.
▶ Open this deck in the flashcard maker
Frequently Asked Questions
How many flashcards should I make per lecture?
Most lectures give you somewhere between 25 and 50 useful cards. Dense science or vocabulary-heavy lectures can go higher, and discussion-style lectures may give you only a dozen. If you're past 60, check if you're carding context instead of testable ideas.
Can I paste my slide text straight into the flashcard maker?
You can paste any text that's in front : back form, one card per line. Pasting raw bullet points won't give you good cards, though, because a bullet isn't a question and answer. Take a few seconds to turn each idea into a question or a term with a short definition first.
What format does Paste a list need?
Put one card on each line with the front, then a space, a colon, a space, then the back. For example, "Mitochondrion : Organelle that makes most of the cell's ATP." Avoid extra colons inside the card text so each line splits in the right spot.
Should I make flashcards during the lecture or after?
After is usually better. During class, focus on listening and taking notes, and mark anything the instructor stresses. Then make your cards the same day, while the lecture is fresh and you can still read your own notes.
Is it okay to use pictures from my lecture slides?
Many students add a screenshot of a course diagram to a deck they use only for their own study, but check your school's policy first. Don't share or post decks that contain someone else's images unless you're allowed to. Drawing a quick sketch and photographing it works too, and drawing it is good practice.
Can I add the next lecture to the same deck?
Yes. Paste the new lines and choose Add to deck instead of Replace deck. Many students keep one deck per lecture during the unit, then combine them before the unit test.
How do I keep my decks if I change computers?
Click Download .csv to save a file of each deck. Later, use Import a file in the maker to load it again. Get share link is another option, since anyone who opens the link gets their own copy of the deck, including you on another device.
Should I print lecture flashcards or study them on screen?
Both work. Screen study with Shuffle and Read aloud is quick for daily review. Printed double-sided cards are nice for studying away from your laptop or sorting into "know it" and "still learning" piles by hand.